
I am so happy you decided to learn how to crochet the classic granny square. Your crochet life won’t be the same after you cross this threshold. The classic granny square, a staple for beginners, is probably the most popular crochet motif. Learning how to crochet this granny square will widen your creative possibilities, as there are countless patterns for all sorts of projects that are based on one or more (or many!) granny squares.
In this post, you’ll find a detailed tutorial, as well as a written pattern and diagram to guide you through the process. Plus, I’ll share some helpful tips, variations, and creative ideas to make your granny squares truly unique.
This post may contain affiliate links. This means that if you make a purchase, I will receive a small commission at no extra cost to you. All opinions are my own. You can read my Privacy Policy here.
You will find in this post…
The Granny Square Motif
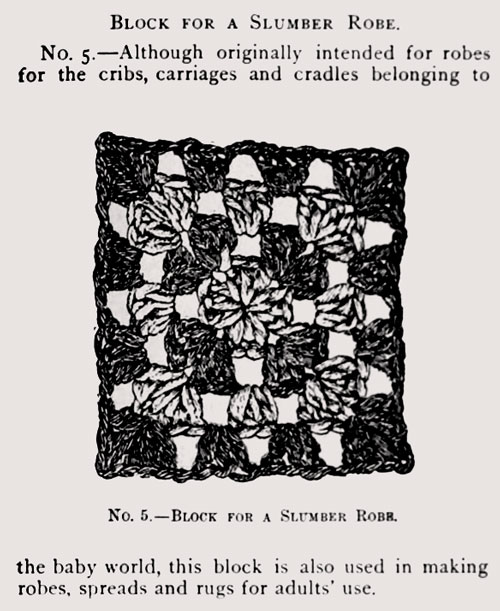
Having its earliest published example in 1981’s book The Art of Crocheting, the classic granny square truly found its groove during the 1960s and 1970s when it became a beloved symbol of the free-spirited fashion of the era.
Fast forward to today, and the granny square is experiencing a fabulous revival in the modern crochet scene. Crocheters around the world are rediscovering its versatility and timeless appeal, and the granny square has come full circle, proving its enduring spirit.
Its simple yet iconic structure starts with a small foundation ring at the center, surrounded by clusters of double crochet stitches, separated by chain spaces. Each corner consists of two clusters with a chain space between them, allowing the square to grow evenly with each round.
Getting Started: What You Need to Know
About This Pattern
There are different ways to crochet the classic granny square, and each crocheter has their favorite. The pattern we will cover here is the one I like the most, and the one that I find easiest for beginners. After you master one method, you will be able to try other approaches and choose the one that suits you best.
To follow along with this tutorial, you’ll need to know a few basic stitches and techniques. These include creating a slip knot, making a chain, working double crochet stitches, fastening off, and weaving in the ends. If you struggle with any of these, be sure to review them before you start.
We’ll start with a one-color square as a beginner project. After that, we’ll learn how to change colors to make the multicolored version and explore a few more tips and variations for you to try. So, let’s get started…
Tools and Supplies You Will Need
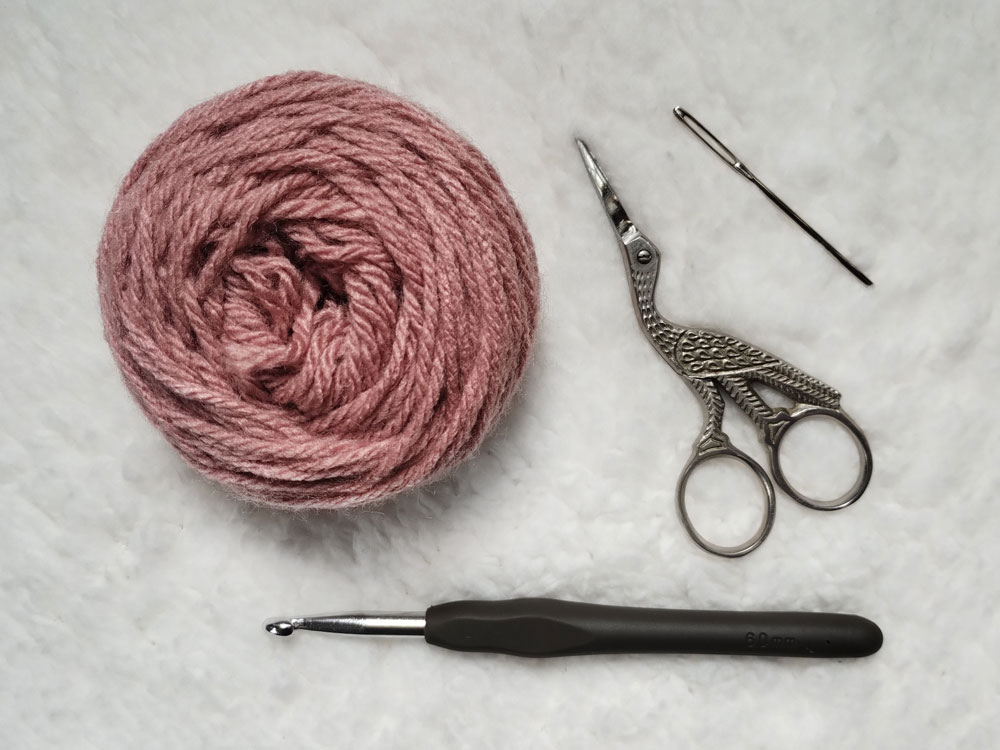
Yarn: You can use any type of yarn to make a granny square. As a beginner, you should start with medium weight yarn and avoid thin, fuzzy, or slippery yarn.
Crochet Hook: The size of the crochet hook depends on the yarn you are using. If you’re not sure what hook to use, check the recommended hook size on the label of your yarn.
Scissors: To cut your yarn.
Tapestry Needle: To weave in the ends.
For this tutorial, I am using medium weight yarn and a 6 mm (J-10) hook. The finished size of my 4-round granny square is approximately 12 x 12 cm (4.5 x 4.5 in).
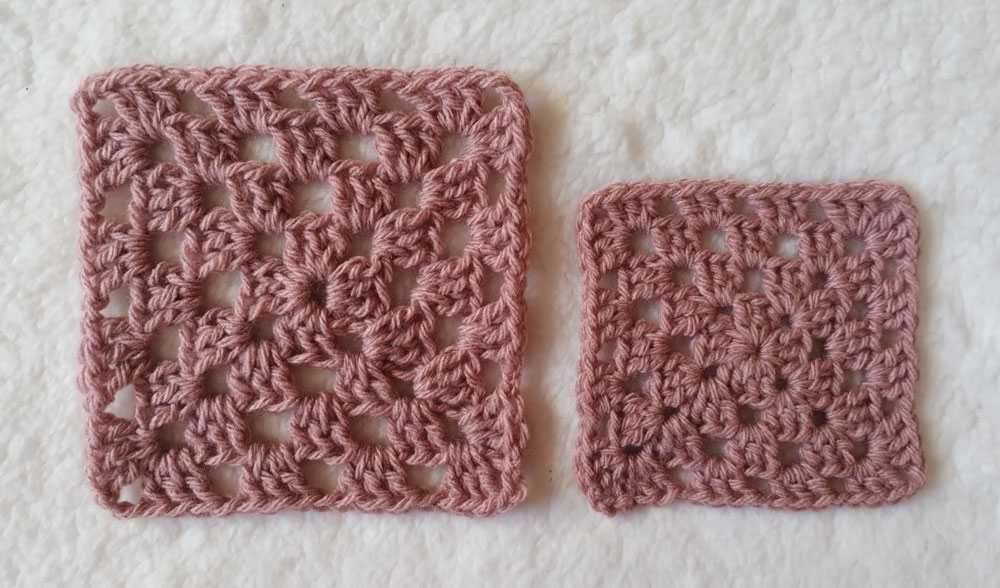
Granny Square Sizes
The size of your granny square depends on three basic factors:
Number of rounds: The more rounds you crochet, the bigger your granny square will be.
Yarn weight: With the same stitch tension and number of rows, the thicker the yarn, the larger your granny square will be.
Crochet hook: Similarly, the size of the crochet hook will also affect the final size of your square. A larger hook will create a looser, larger square, while a smaller hook will make it tighter and smaller.
Pattern Notes
- Skill level: Basic.
- This tutorial uses standard US terms.
- The granny square is worked in rounds.
- All rounds, except the last, are closed with a half double crochet.
- The chain 1 at the beginning of the rounds doesn’t count as a stitch.
- In this tutorial, we will be working four rounds, but you can continue growing your granny square for as many rounds as you like.
Classic Granny Square Detailed Tutorial for Beginners
Here, you will find a step-by-step detailed description of the process of crocheting the classic granny square. If you’re not a beginner, you might want to jump directly to the written instructions or the diagram.
Foundation Ring
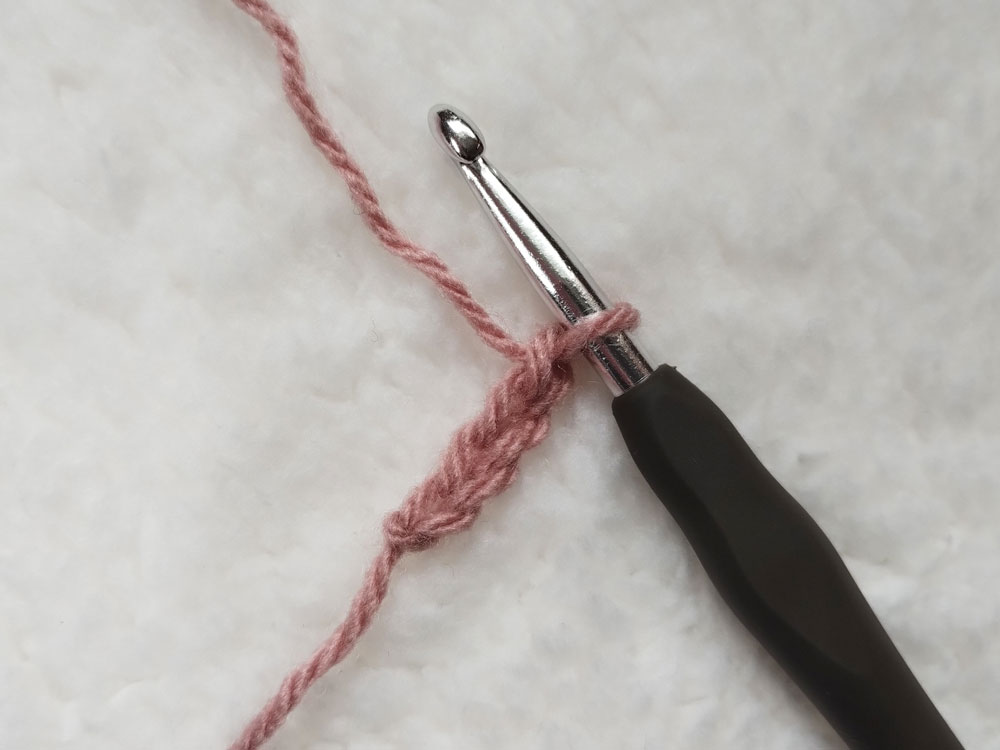
Step 1: Start with a slip knot and chain 4.
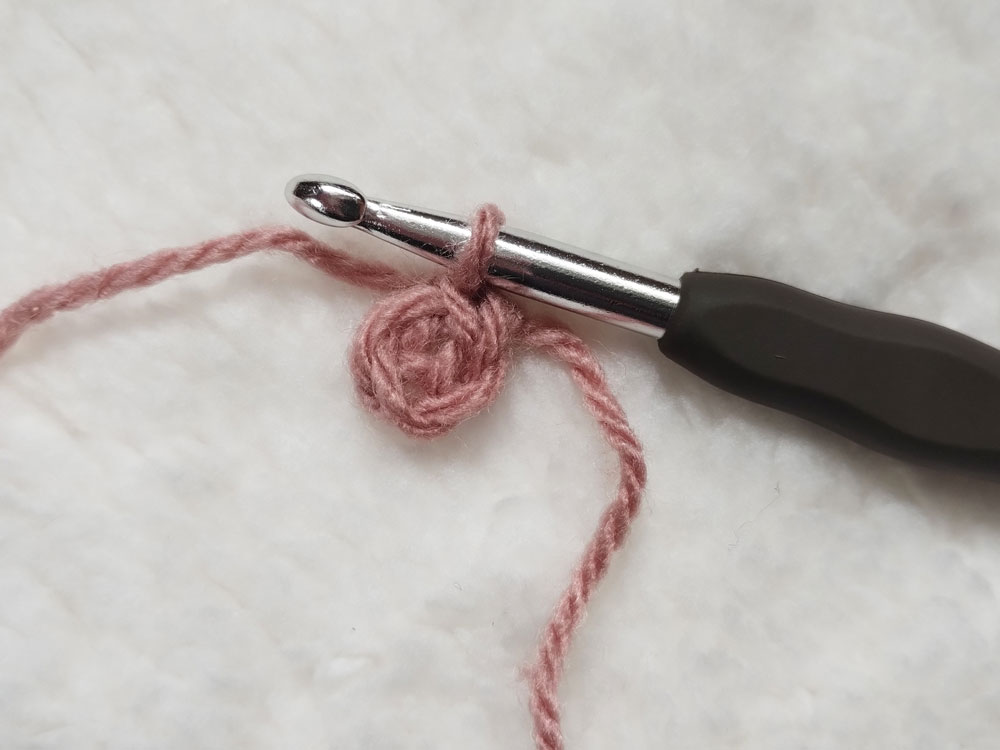
Step 2: Slip stitch into the first chain to form the foundation ring.
Note: If you find the ring to be too small, you may chain 5 to create a bigger ring, but try to keep it as small as possible as it will make your square look better.
Round 1
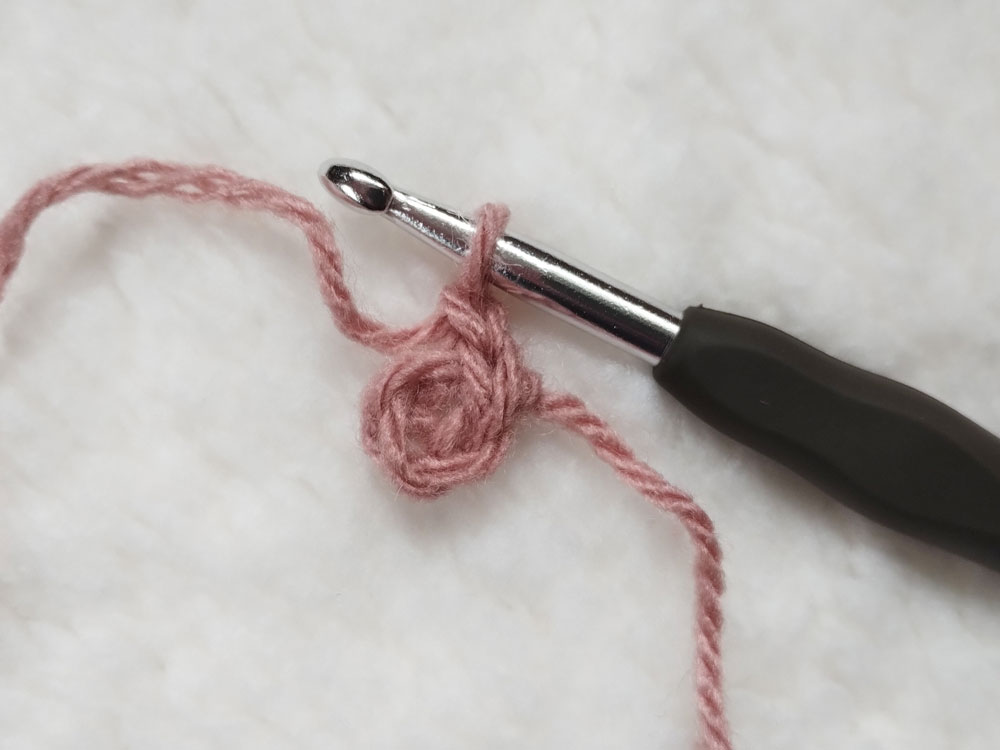
Step 3: Chain 1 (this chain does not count as a stitch).
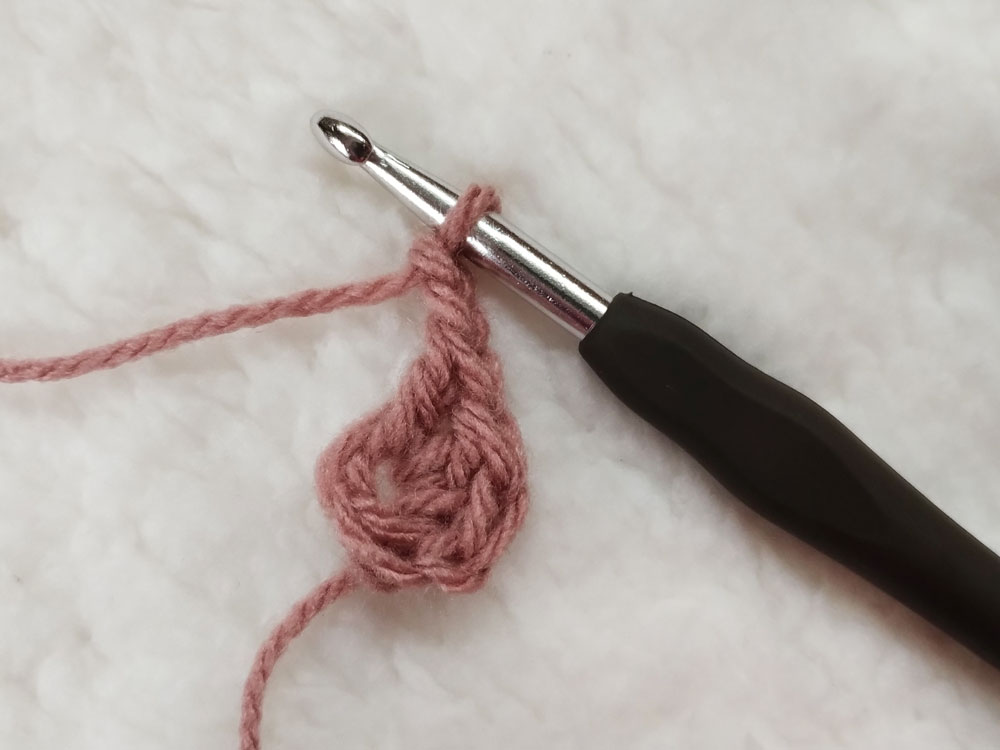
Step 4: Work 3 double crochets into the foundation ring, then chain 2.
Step 5: Repeat Step 4 twice.
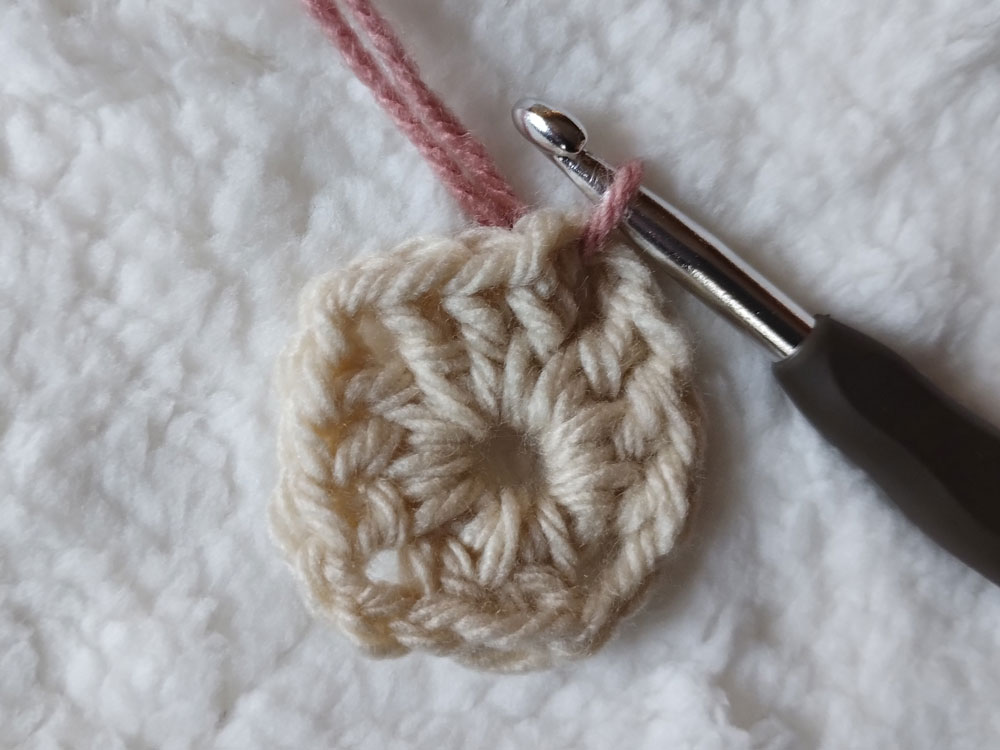
Step 6: Work 3 double crochets into the foundation ring.
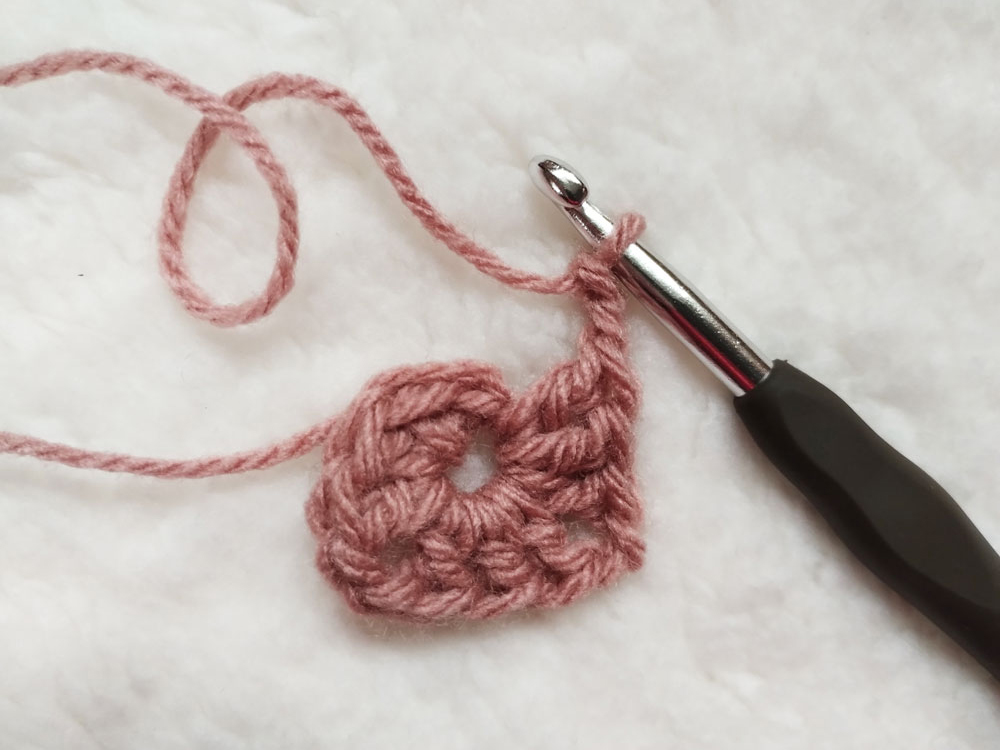
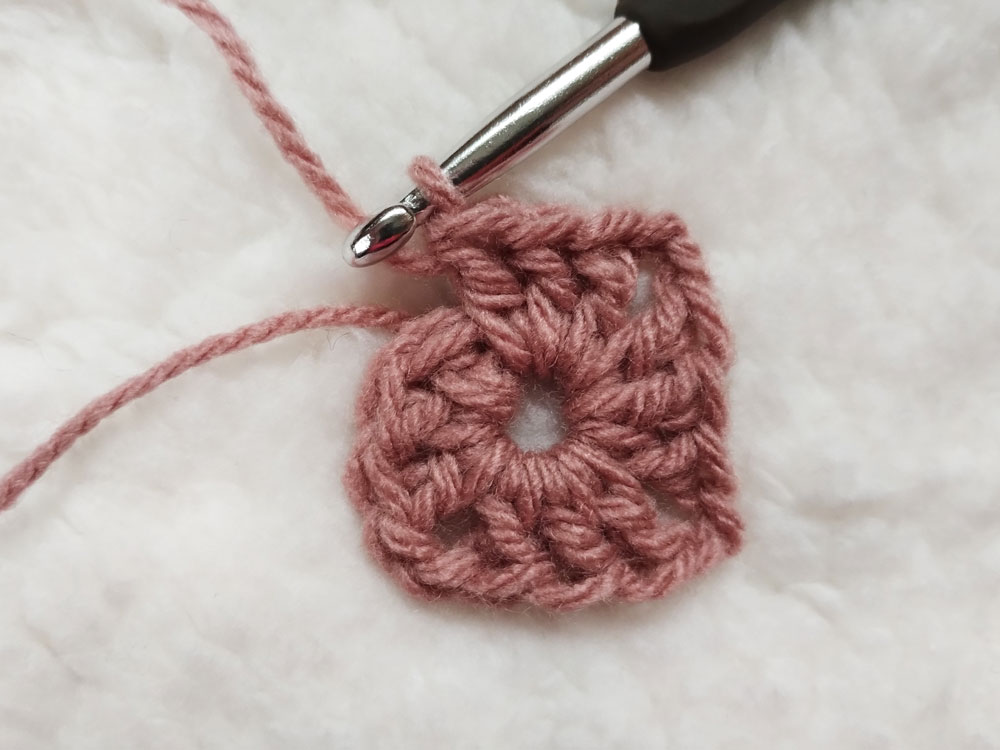
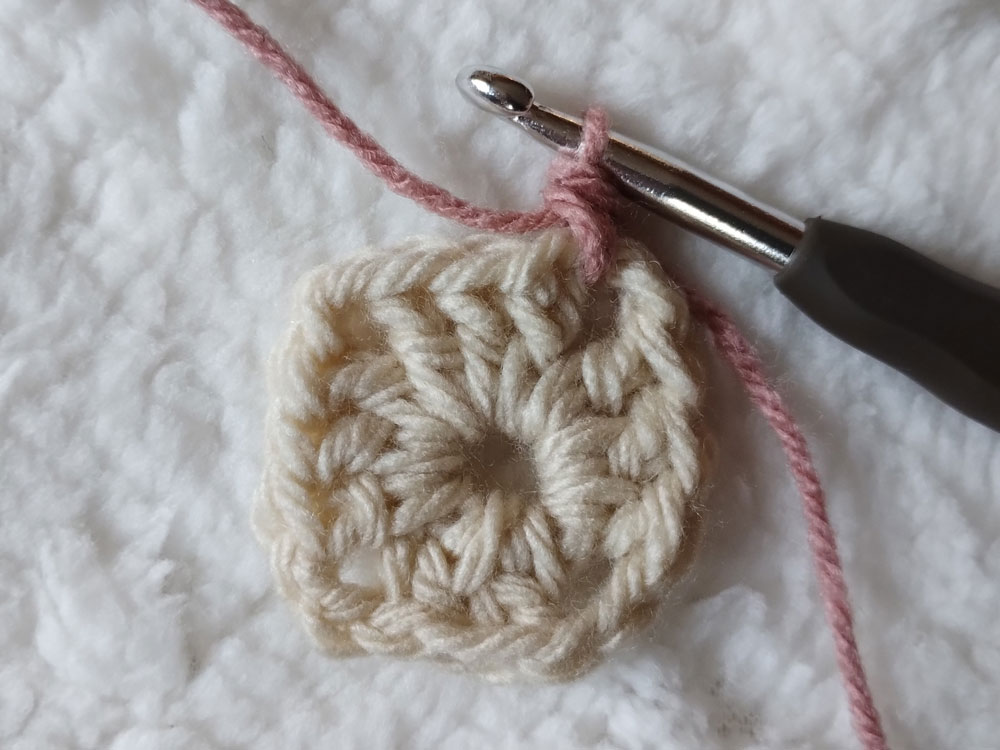
Step 7: Work a half double crochet into the top of the first double crochet…
…to close the round.
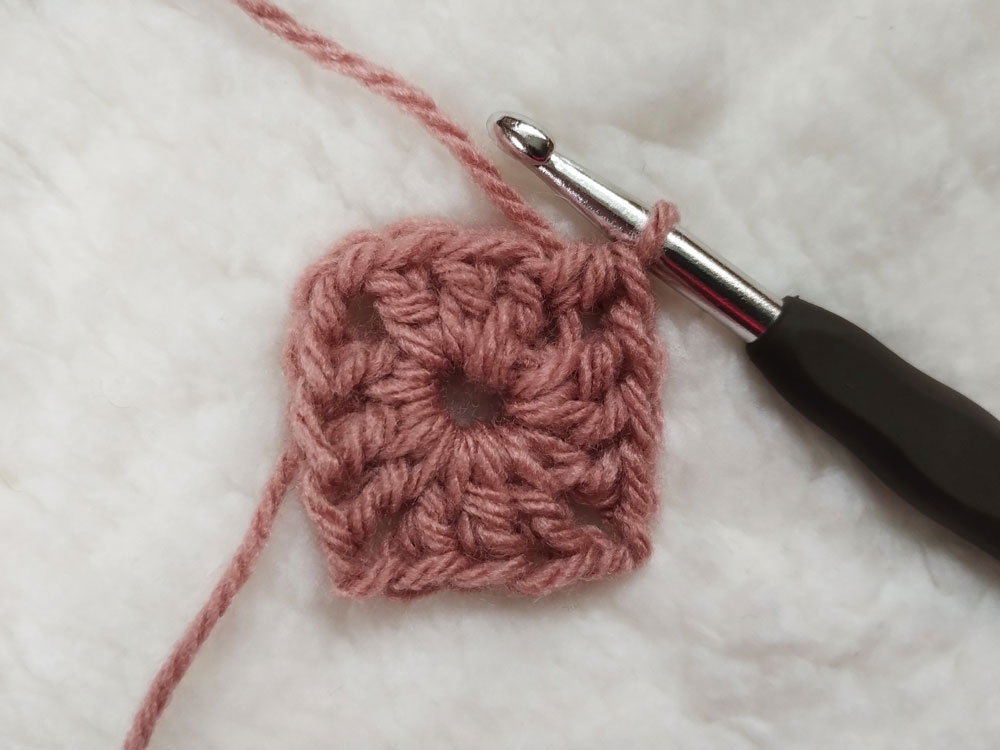
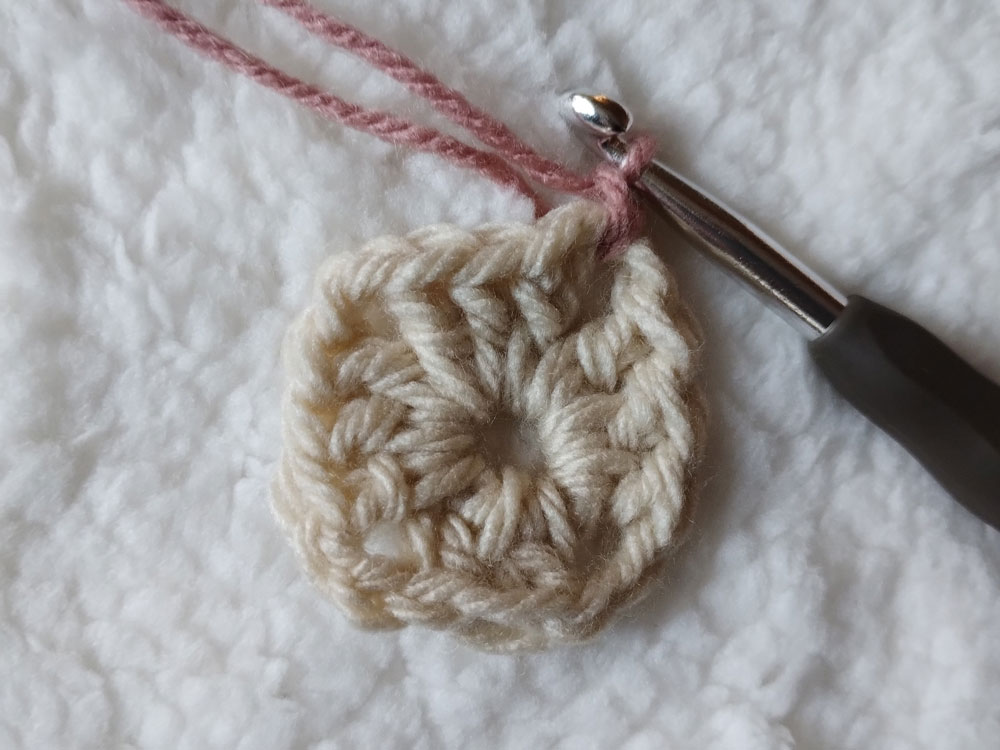
Round 2
Step 8: Chain 1 (this chain does not count as a stitch).
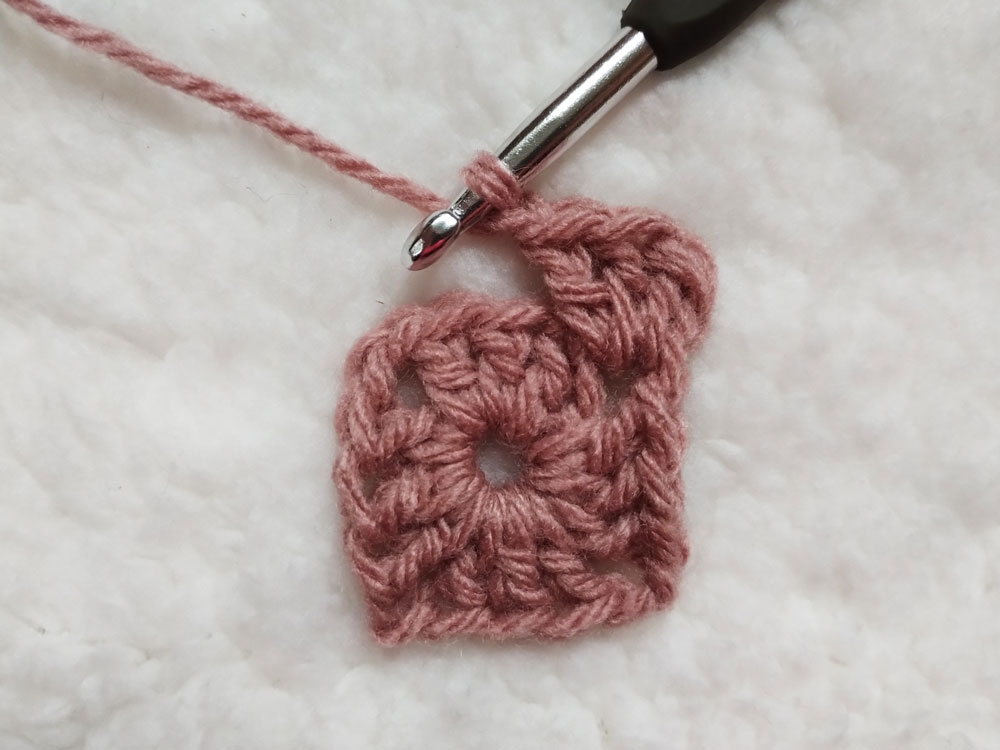
Step 9: Work 3 double crochets into the half double crochet space, then chain 1.
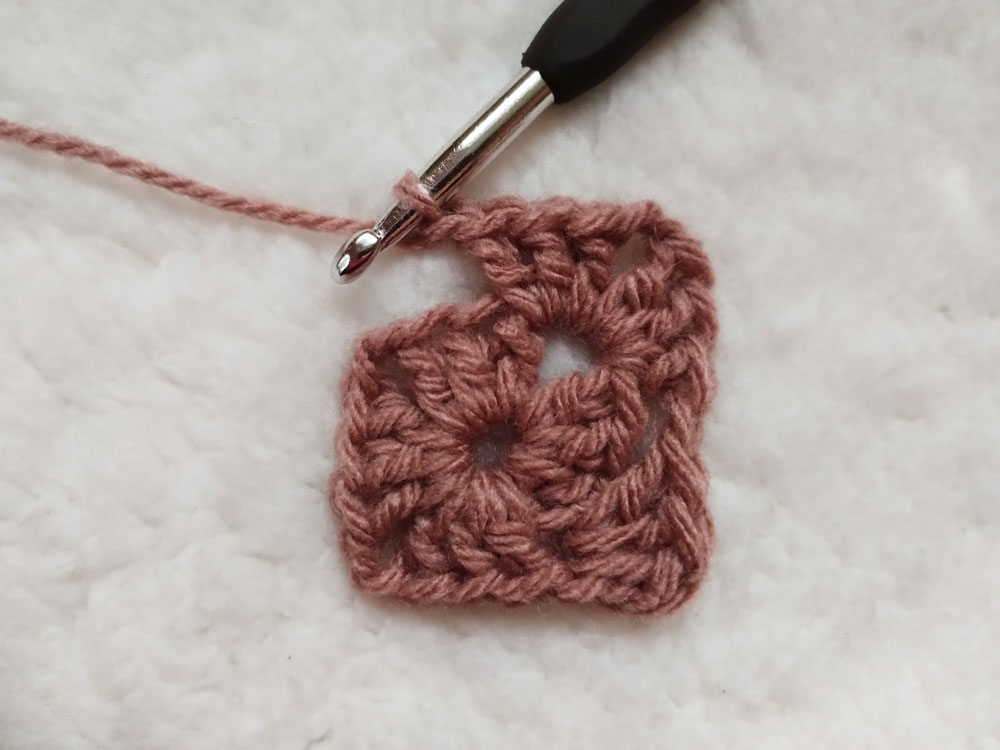
Step 10: Work 3 double crochets, chain 2, and 3 more double crochets into the next chain 2 space from the previous round, then chain 1.
Step 11: Repeat Step 10 twice.
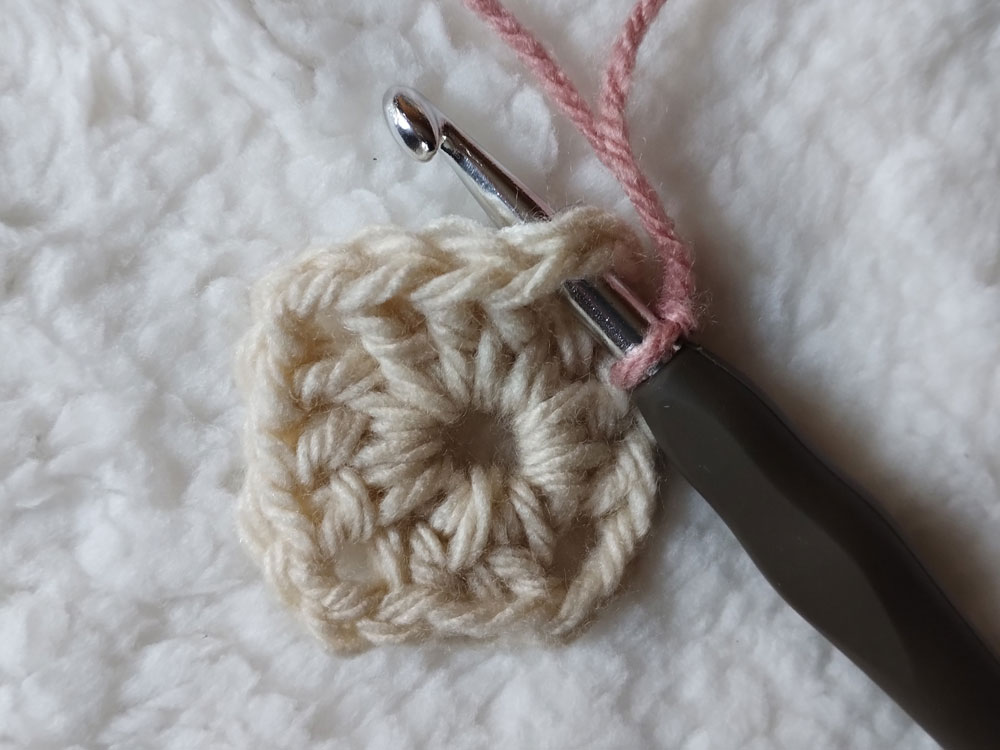
Step 12: Work 3 double crochets into the half double crochet space.
Step 13: Close the round with a half double crochet into the top of the first double crochet.
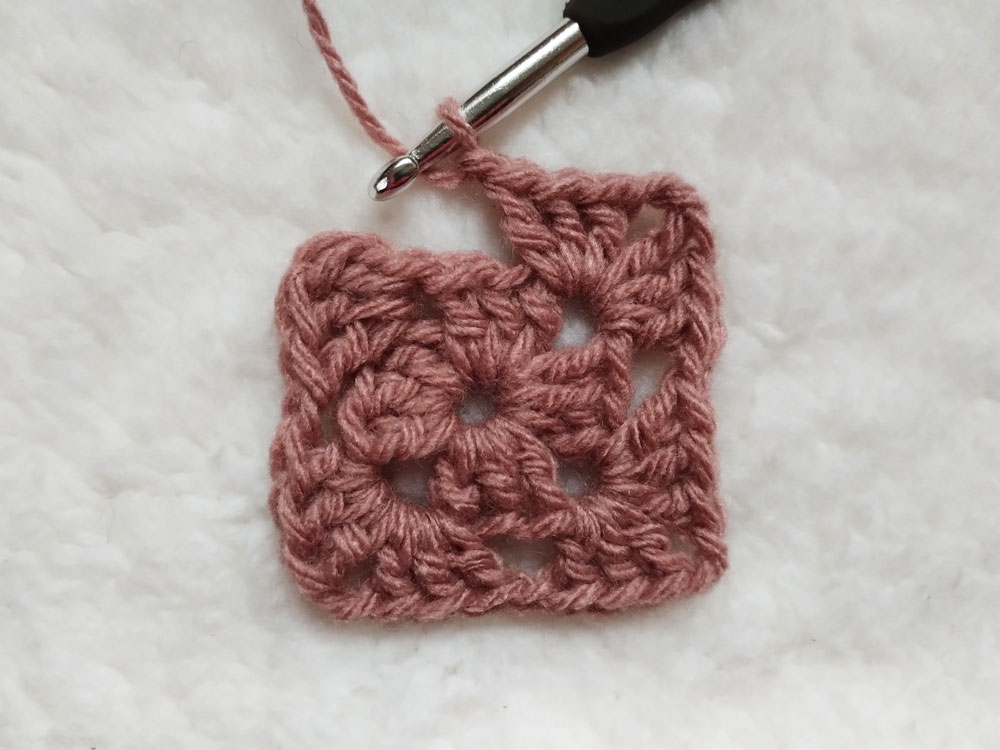
Round 3
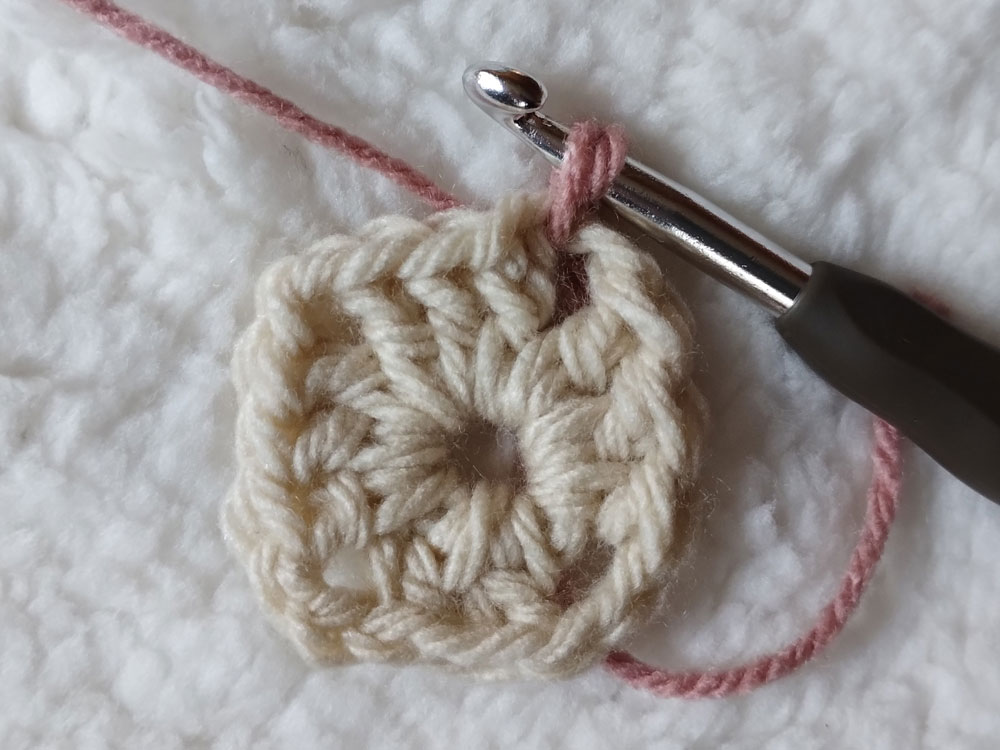
Step 14: Chain 1 (this chain does not count as a stitch).
Step 15: Work 3 double crochets into the half double crochet space, then chain 1.
Step 16: Work 3 double crochets into the next chain 1 space, then chain 1.
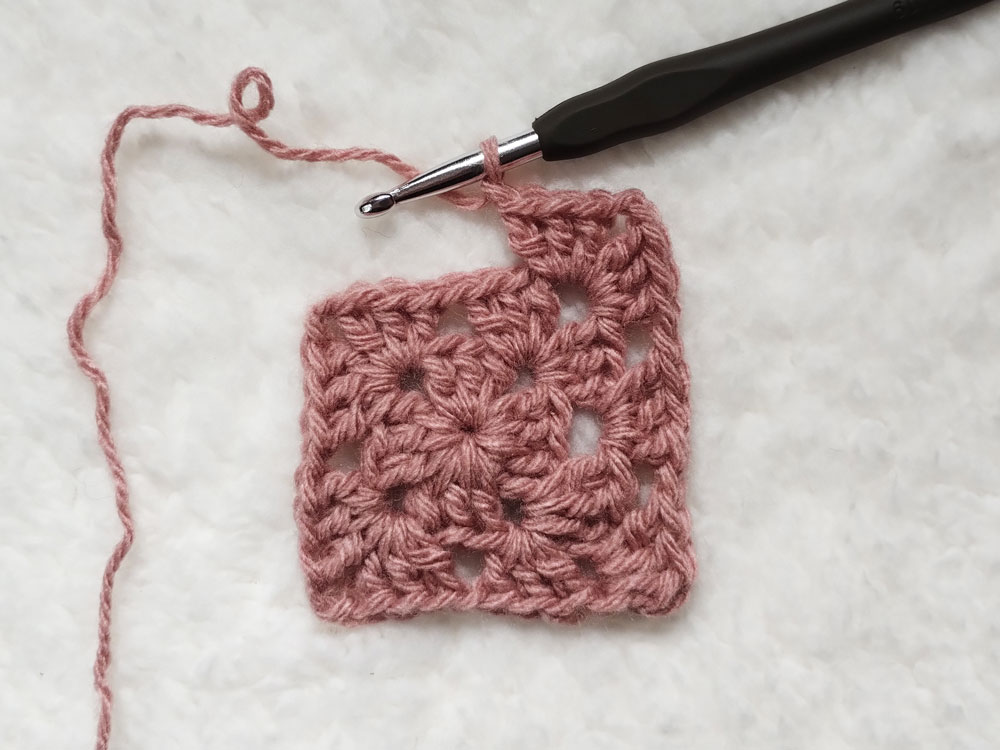
Step 17: Work 3 double crochets, chain 2, and 3 more double crochets into the next chain 2 space from the previous round, then chain 1.
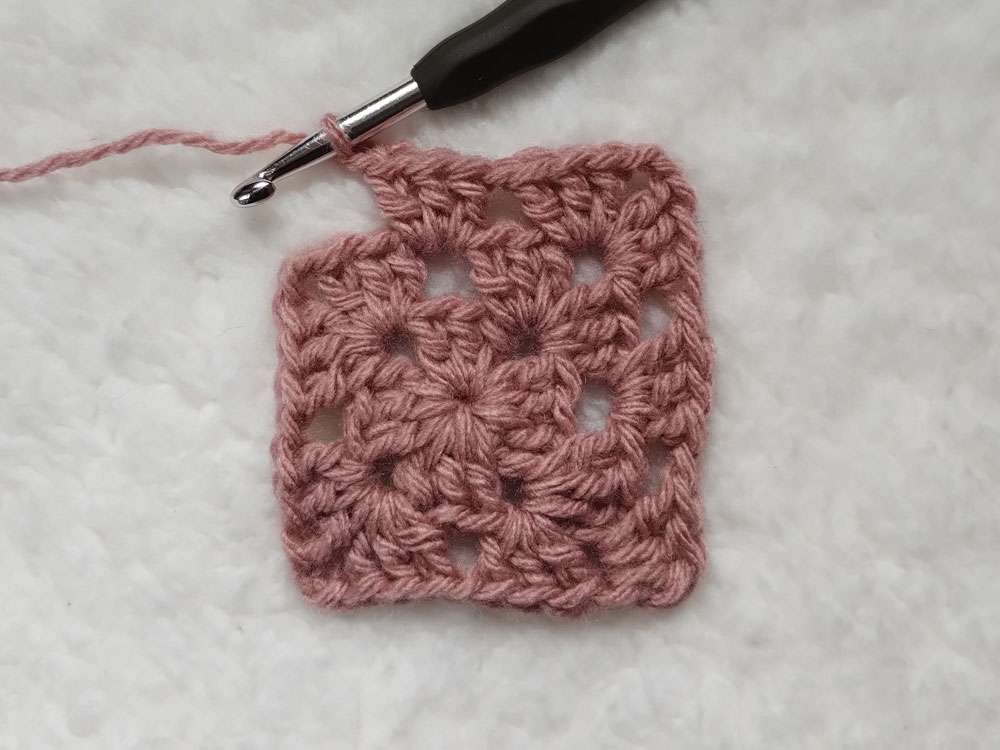
Step 18: Work 3 double crochets into the next chain 1 space, then chain 1.
Step 19: Repeat Steps 17 and 18 twice.
Step 20: Work 3 double crochets into the half double crochet space.
Step 21: Close the round with a half double crochet into the top of the first double crochet.
Note: The instructions for the next round will be the basic instructions for every round after the 3rd round. After the 4th round, you will be able to continue to grow your granny square for as long as you like.
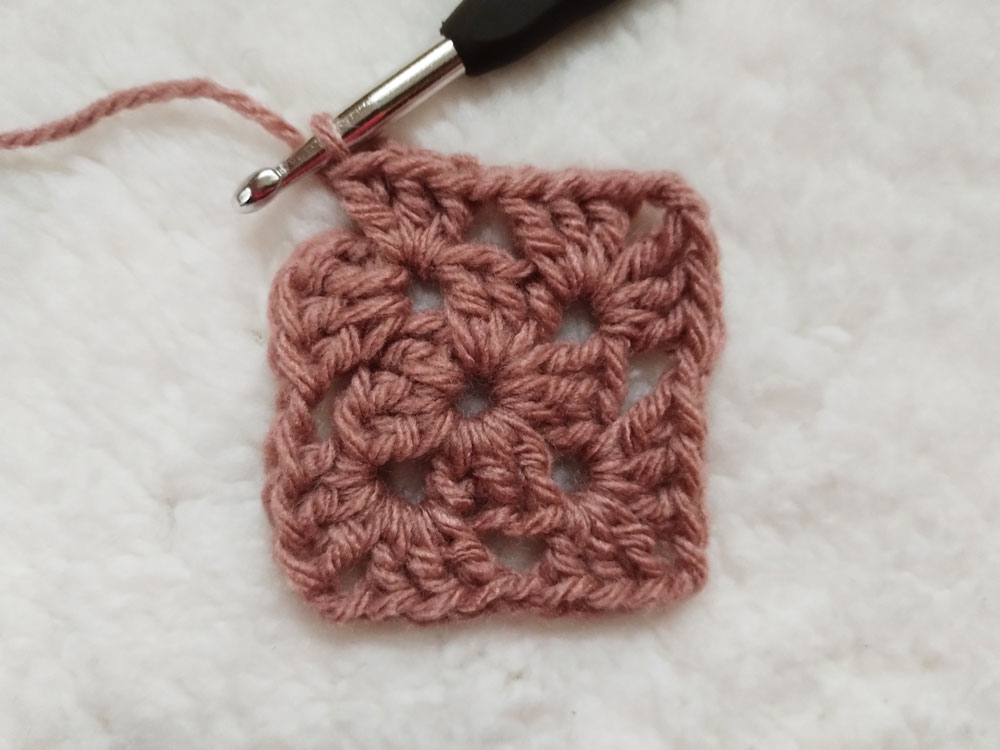
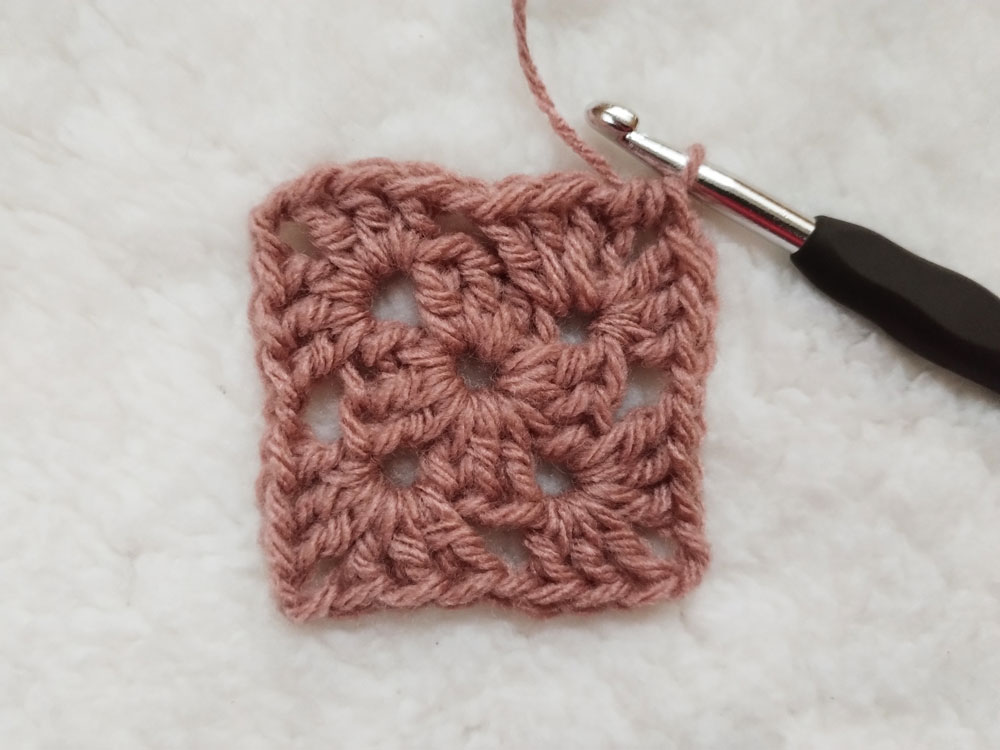
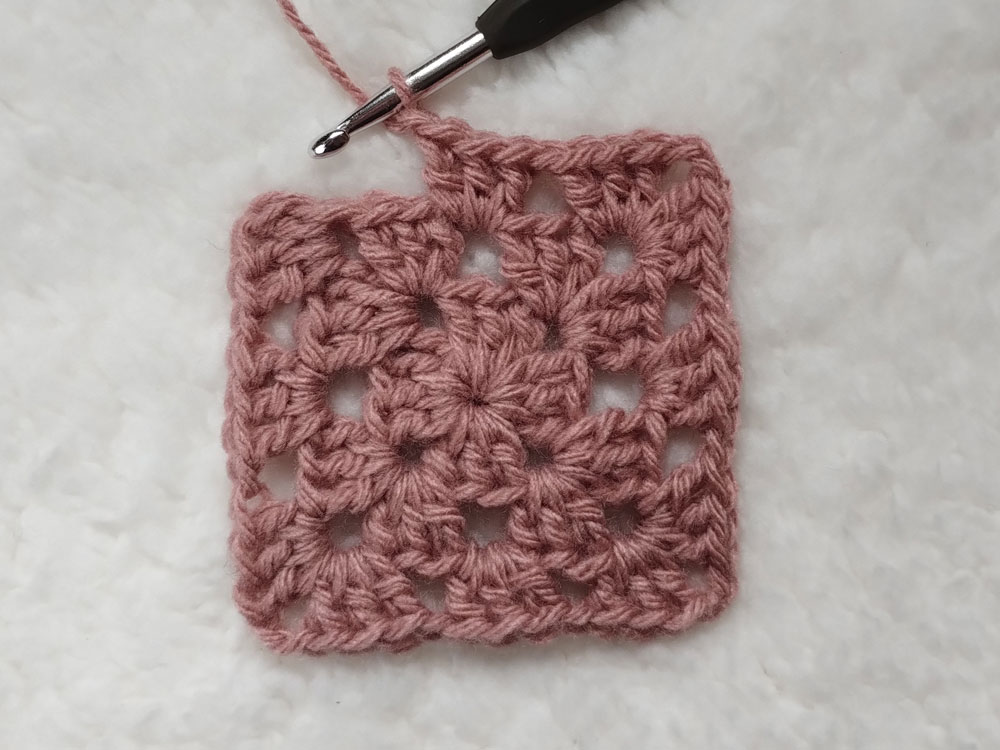
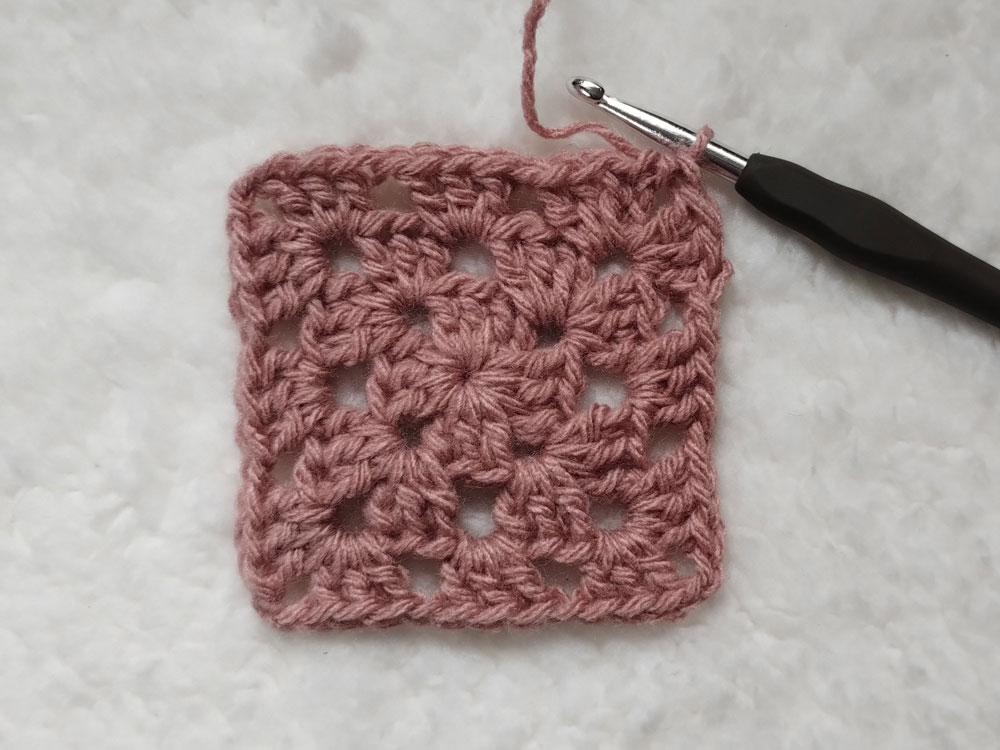
Round 4
Start: You will start every round with a chain 1, followed by 3 double crochets into the half double crochet space from the previous round, then chain 1.
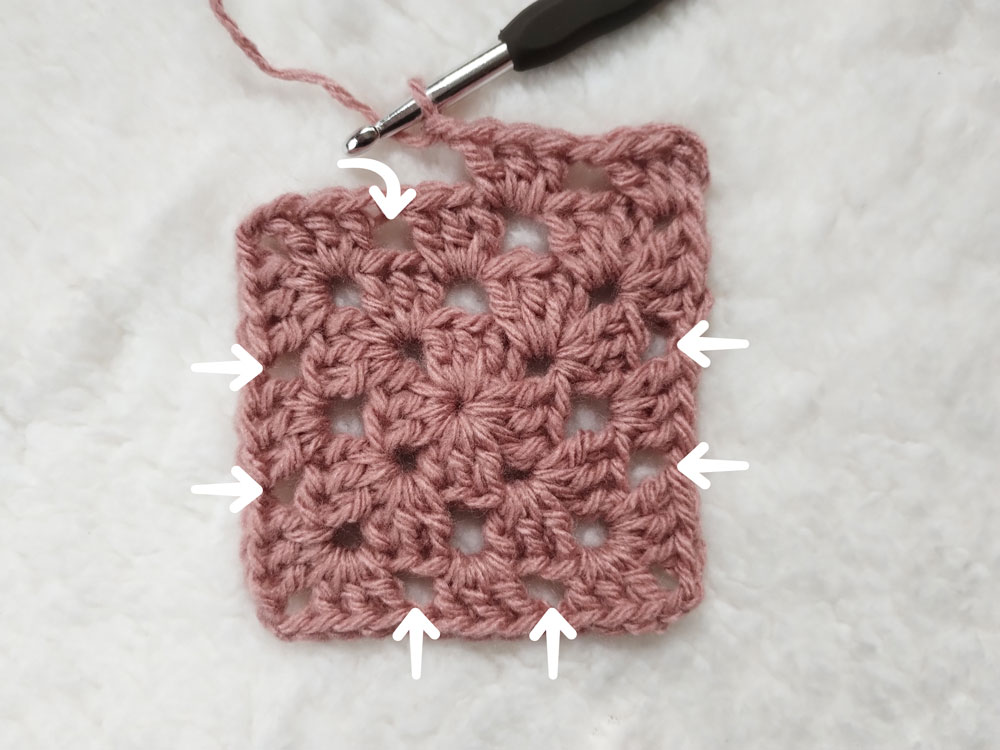
Sides: Work a 3 double crochet cluster into every chain 1 space from the previous round on each side of the square.

Corners: Work 3 double crochets, chain 2, and 3 more double crochets into every chain 2 space from the previous round, then chain 1.
Closing rounds: Complete the last corner by working 3 double crochets into the half double crochet space, then close the round (except the last) with a half double crochet into the top of the first double crochet.
Repeat the instructions for Row 4 for as many rows as you like.
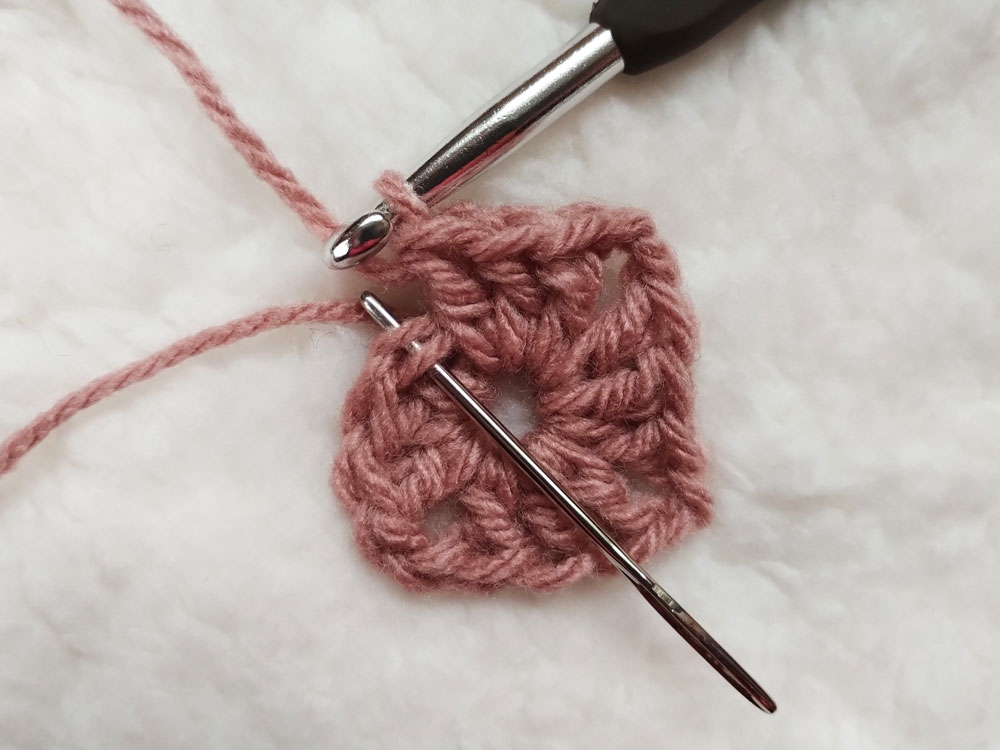
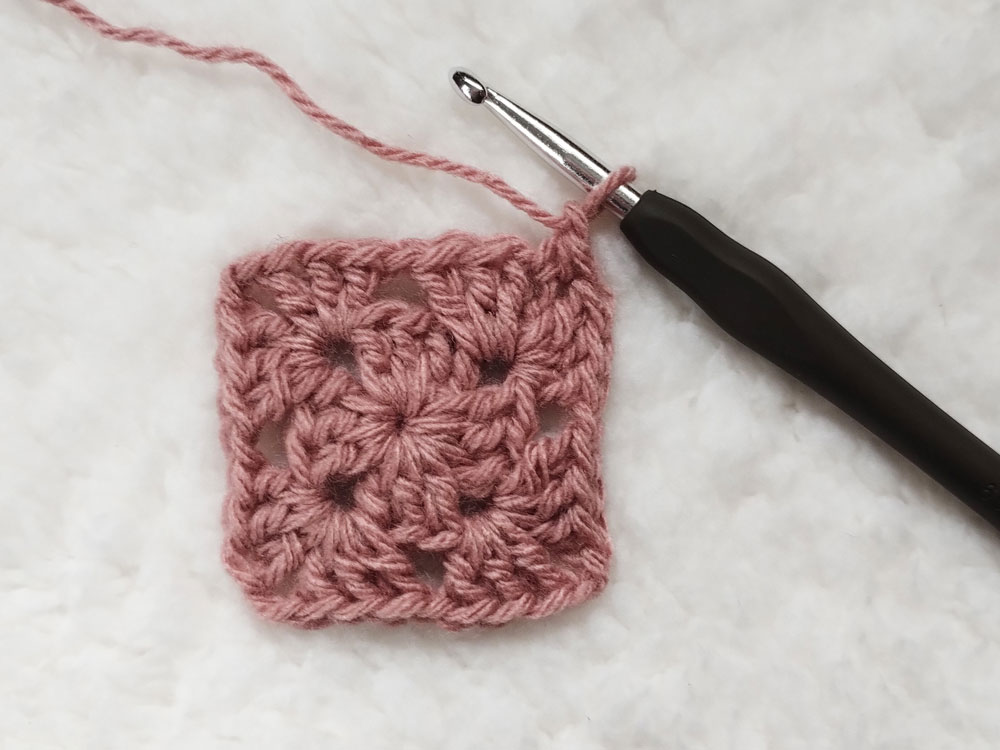
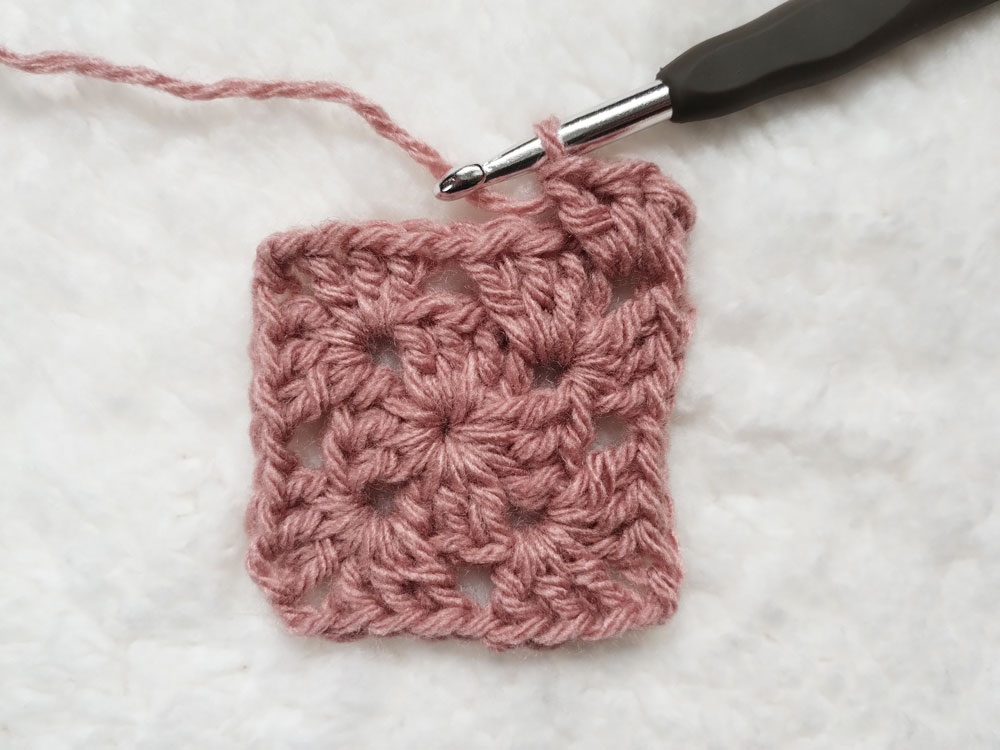
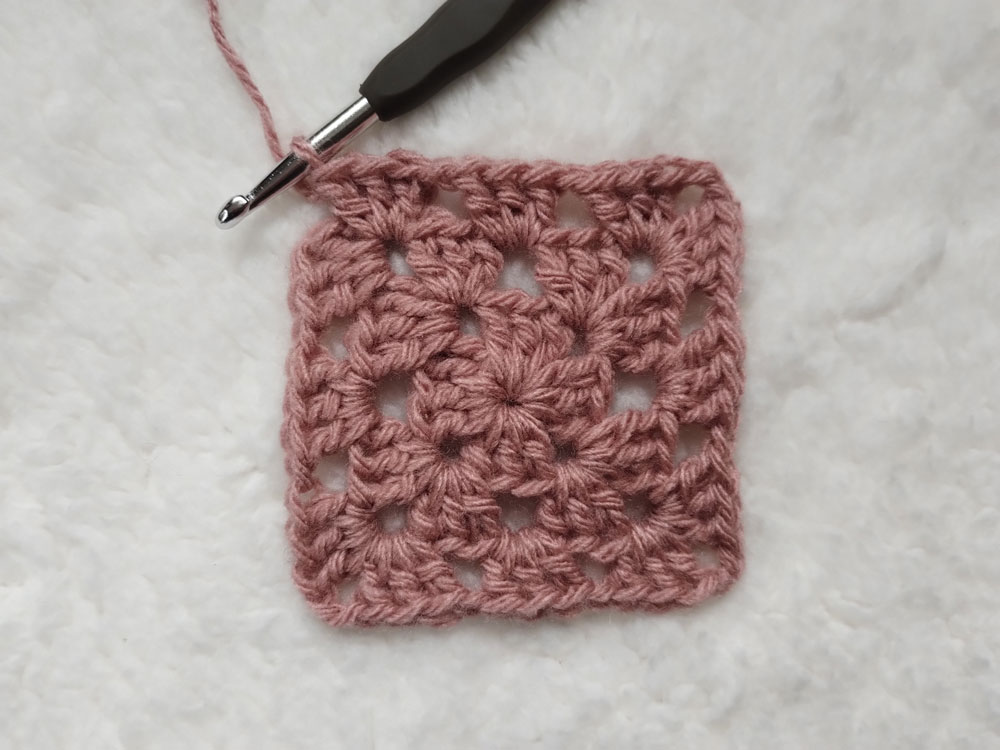
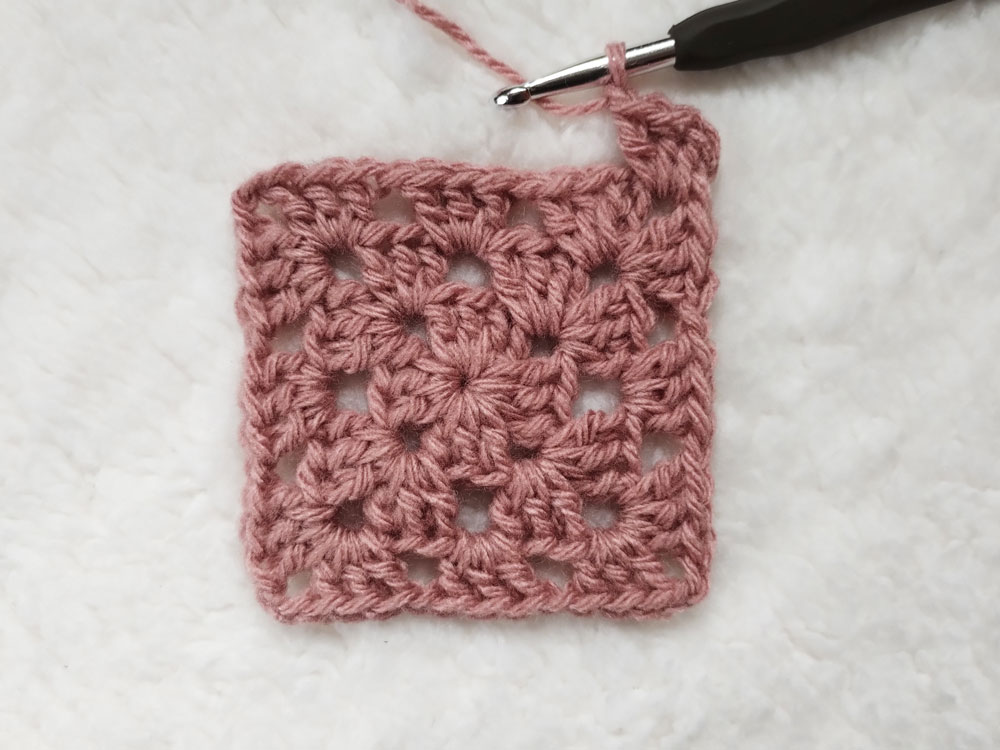
Last Round
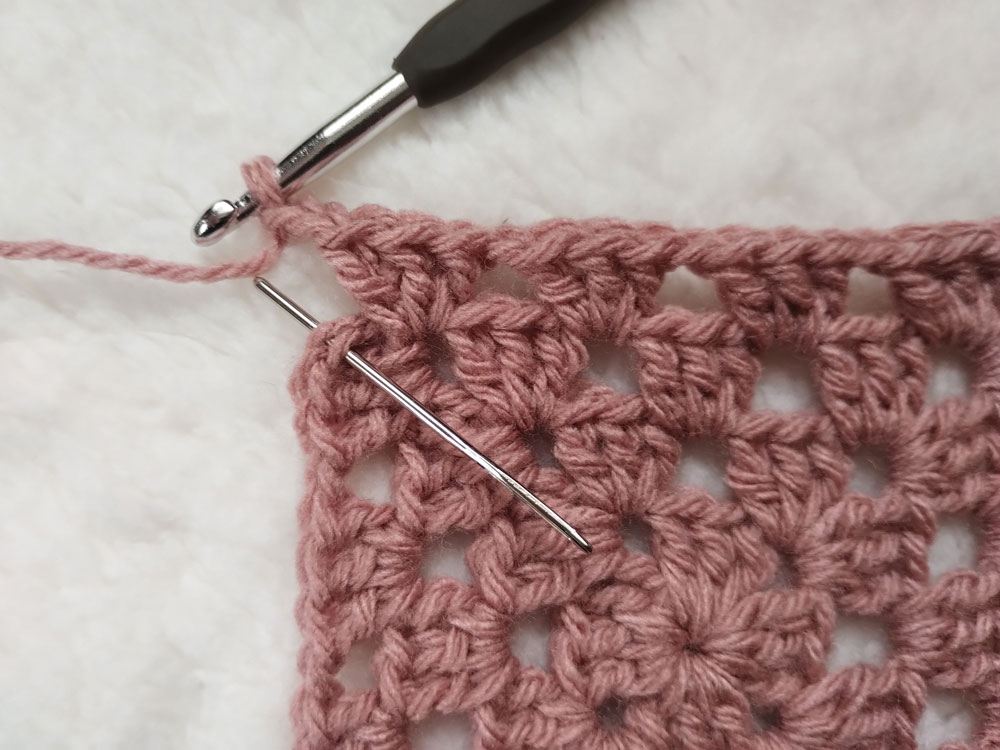
Finishing: To finish your last round, instead of working the half double crochet, you will chain 2…
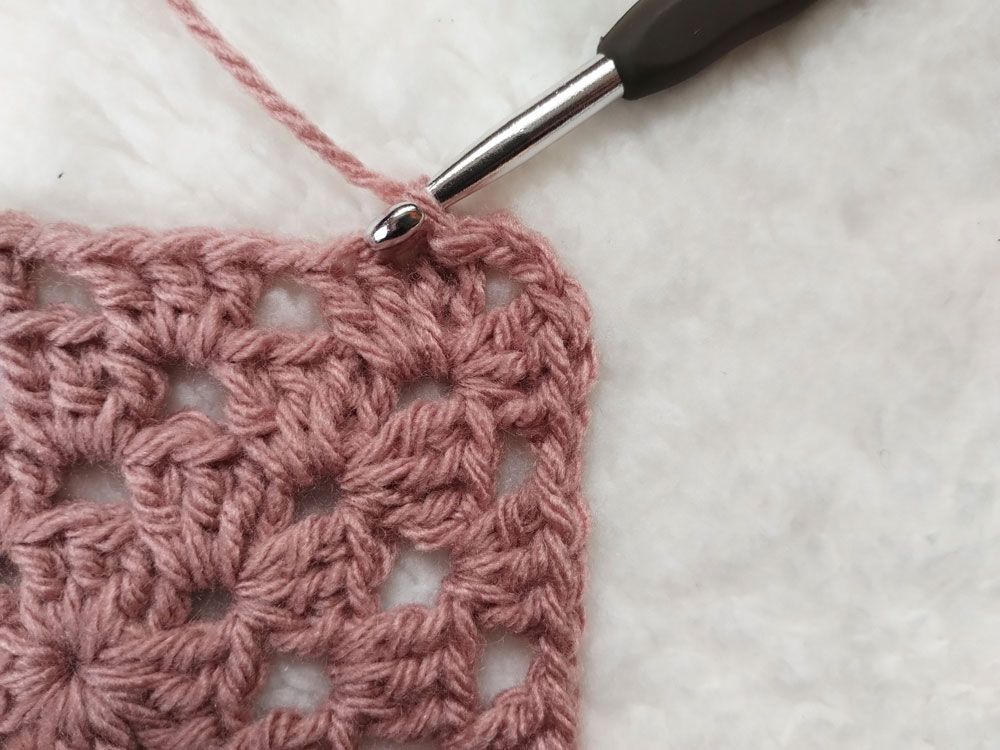
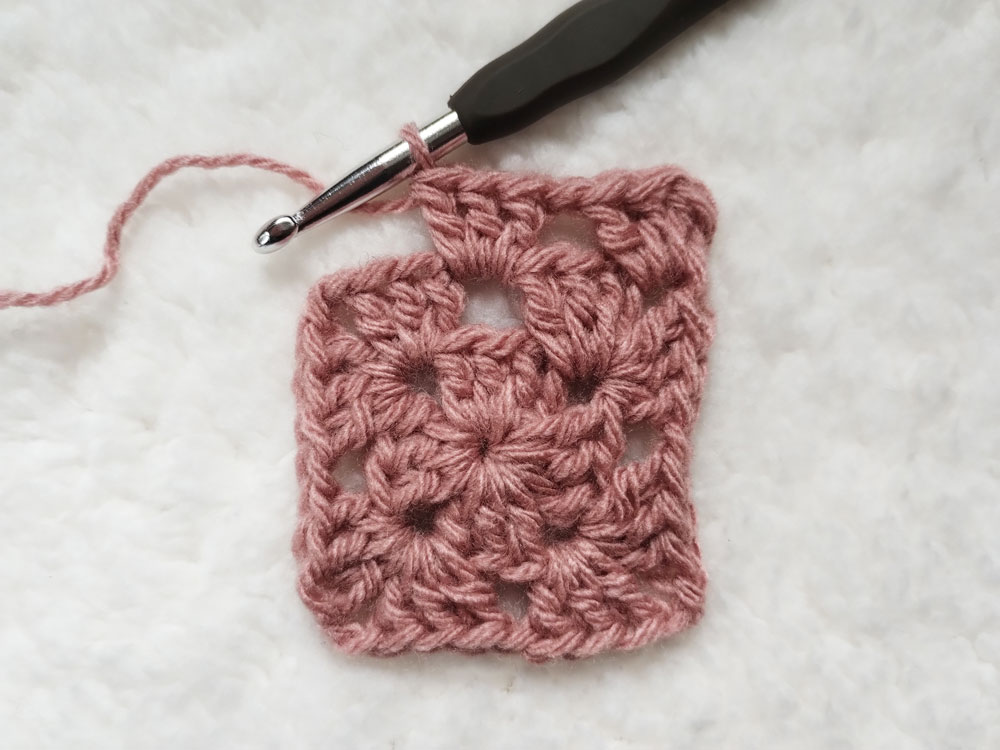
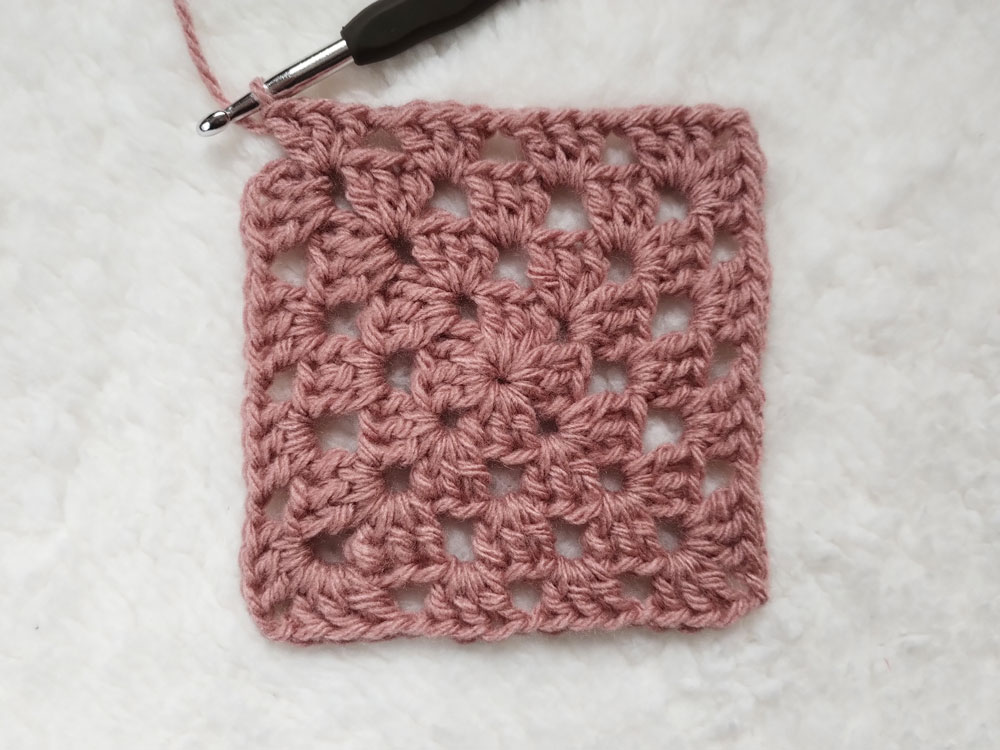
…and close the round with a slip stitch into the first double crochet. Then you will fasten off and weave in the ends.
classic Granny Square Written instructions
Terms and Abbreviations (US standard)
| Term | Abbreviation |
| begin/beginning | beg |
| chain stitch | ch |
| chain or space previously made | ch- |
| double crochet | dc |
| half double crochet | hdc |
| round(s) | rnd(s) |
| slip stitch | sl st |
| space | sp |
| stitch(s) | st(s) |
Pattern Notes
► Skill level: Basic. ► This tutorial uses standard US terms. ► The granny square is worked in rnds. ► Ch 1 at beg of rnd doesn’t count as a st. ► Join all rnds with hdc to top of the 1st dc, unless otherwise indicated.
Written Instructions
Start: ch 4, join with sl st to 1st ch to form ring.
Round 1: (RS). ch 1. (3 dc, ch 2) 3 times in ring. 3 dc in ring. Join.
Round 2: ch 1. 3 dc in hdc sp. ch 1. [ (3 dc, ch 2, 3 dc) in next ch-2 sp, ch 1 ] 3 times. 3 dc in hdc-sp. Join.
Round 3: ch 1. 3 dc in hdc sp. ch 1. 3 dc in next ch-1 sp. ch 1. [ (3 dc, ch 2, 3 dc) in next ch-2 sp. ch 1. 3 dc in next ch-1 sp. ch 1 ] 3 times. 3 dc in hdc-sp. Join.
Round 4: ch 1. 3 dc in hdc sp. ch 1. [ 3dc in next ch-1 sp. ch 1 ] 2 times. * (3 dc, ch 2, 3 dc) in next ch-2 sp. ch 1. [ 3 dc in next ch-1 sp. ch 1 ] 2 times. ** Repeat from * to ** twice more. 3 dc in hdc-sp. ch 2. Join with sl st to top of the 1st dc.
Fasten off and weave in the ends.
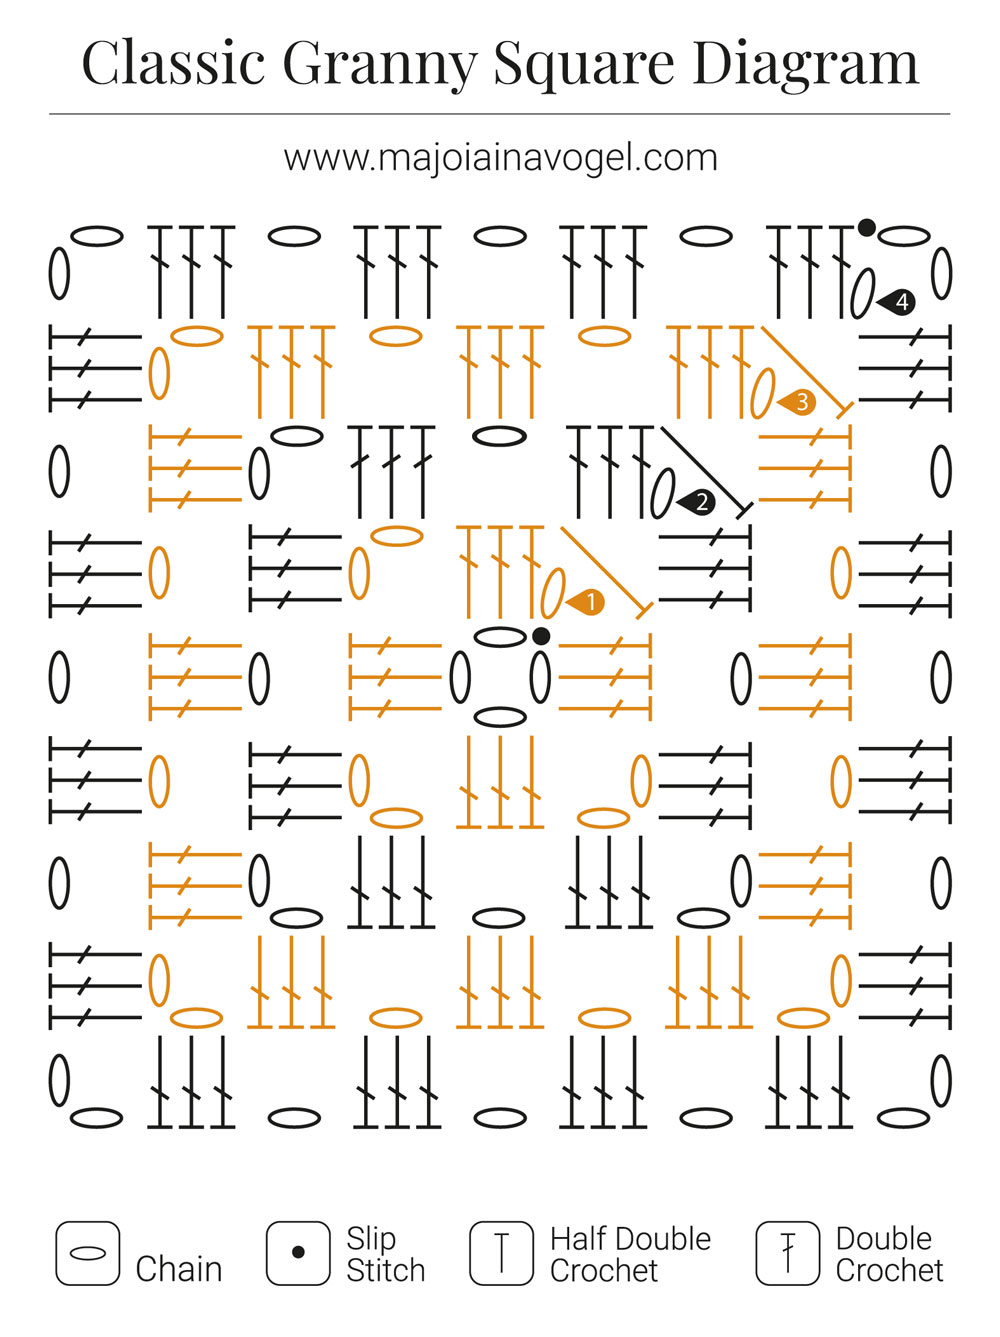
Diagram
How To Change Colors For a Multicolored Granny Square
Whenever you want to change the round color you will have to close the previous round as if it was the last round, and attach the new color to work the following round. To attach the new color you might use one of these 2 methods:
Method #1
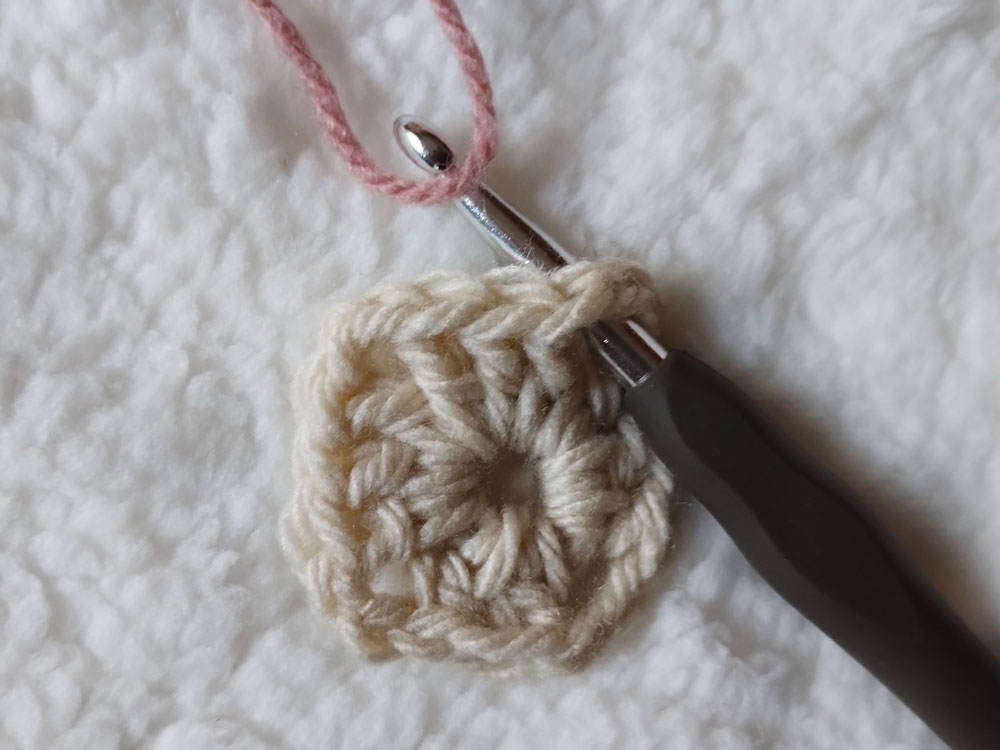
Insert hook into space and grab yarn.
Pull yarn through space forming a loop.
Yarn over and pull yarn through loop.
Method #2
Make a slip knot, insert hook into space and grab yarn.
Pull yarn through space forming a loop.
Yarn over and pull yarn through loop and slip knot.
Fun Variations to Try
Play with Colors
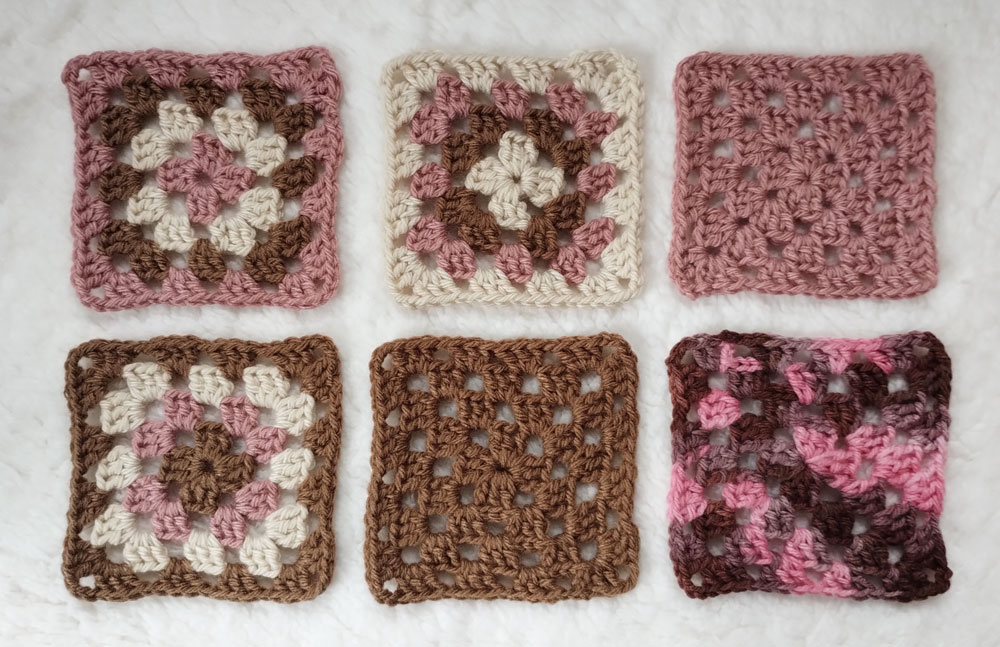
One color, two colors, multicolored, variegated yarn—there are endless ways to bring your granny square to life. You can alternate colors with each row for a striped effect, use variegated yarn for a naturally multicolored square, or stick with a single color for a classic look.
Adjusting the Size
The size of your granny square can be influenced by the yarn weight, the number of rows, and the size of your crochet hook. Thicker yarn and larger hooks will result in a bigger square, while thinner yarn and smaller hooks will create a smaller square. Blocking can help even out the size and shape of your finished square.
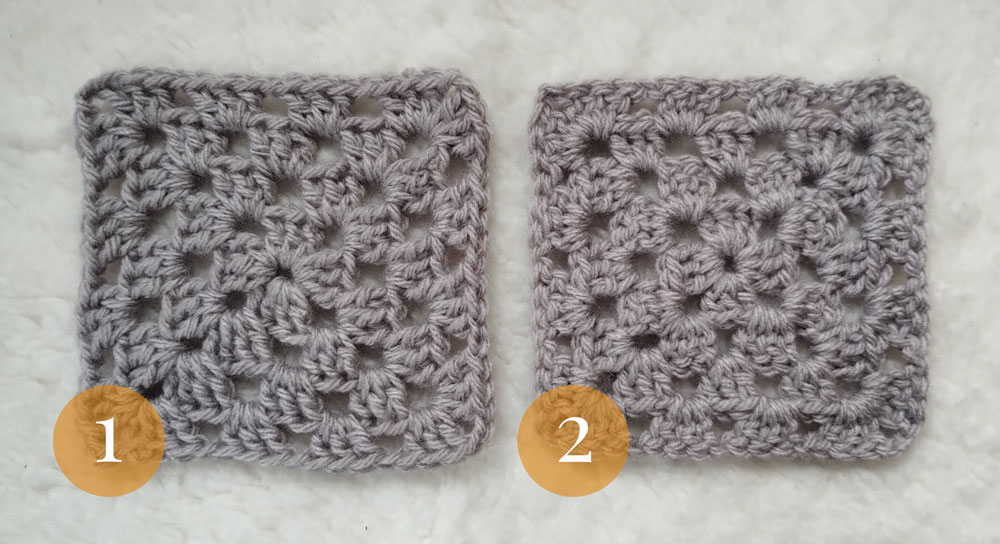
Pro Tip: As your granny square gets bigger, it might get distorted, forming a vortex-like shape. To avoid this effect, you can turn your work after completing a round. This way, your square won’t be distorted and it will also be reversible.
Corners
The sharpness of the corners in your granny square can be adjusted by changing the number of chains you use. For sharper corners, use 3 chains. For less sharp corners, use 2 chains. This small adjustment can make a big difference in the overall look of your square.
Playing with Shapes
Granny squares don’t have to be square! You can easily create other shapes like hexagons and triangles. For a hexagon, you’ll work six sides instead of four, adding an extra corner in each round. To make a triangle, you’ll work three sides, spacing out your corner stitches accordingly. These variations can add an interesting twist to your projects and expand your creative possibilities.
For more granny square inspiration check my Pinterest board here.
Congratulations! You’ve learned the basics and discovered some of the possible variations of the classic granny square. With these new skills, the possibilities for your crochet projects are endless. Whether you’re making blankets, scarves, or decorative items, the granny square is a versatile and timeless motif that will always be in style. Keep crocheting and have fun!
Common Questions About Granny Squares (FAQ)
Use medium weight yarn for beginners. Avoid thin, fuzzy, or slippery yarn as they can be challenging to work with.
The hook size depends on the yarn you use. Check the yarn label for the recommended hook size. Generally, a 6 mm (J-10) hook works well with medium weight yarn.
To avoid distortion, turn your work after each round. This keeps the square shape uniform and makes the square reversible.
Finish the previous round as if it’s the last, then attach the new color using either the slip stitch method or by making a slip knot and pulling it through the space.
The size can be adjusted by changing the number of rounds, using different yarn weights, or using different hook sizes. Thicker yarn and larger hooks make bigger squares.
Granny squares can be used for blankets, scarves, clothing, bags, and various decorative items. The possibilities are endless!
For sharper corners, use 3 chains in the corner spaces. For less sharp corners, use 2 chains.
Yes! You can create hexagons, triangles, and other shapes by adjusting the number of sides and spacing out the corner stitches.