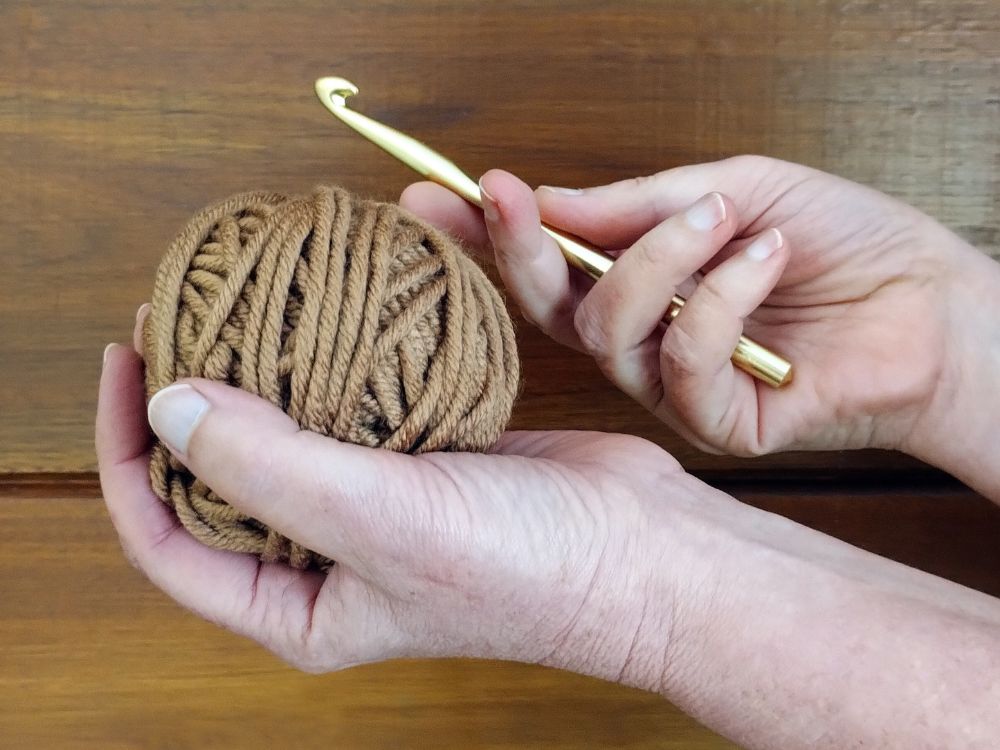
Mastering the art of crochet starts with a crucial challenge: learning how to hold the crochet hook and yarn. A correct technique not only enhances comfort and reduces hand fatigue but also ensures better control over yarn tension, leading to more consistent and beautiful stitches.
By adopting the right grip, you can significantly improve your overall crochet experience, making it more enjoyable and efficient. Whether you’re just starting or looking to refine your technique, understanding these fundamental grips will set a solid foundation for your crochet journey. Let’s explore different ways to hold the crochet hook and yarn to find the method that works best for you!
This post may contain affiliate links. This means that if you make a purchase, I will receive a small commission at no extra cost to you. All opinions are my own. You can read my Privacy Policy here.

Leia esse post em português aqui.
You will find in this post…
Understanding the Anatomy of the Crochet Hook
To effectively hold and use a crochet hook, it helps to understand its anatomy. Most crochet hooks share a common structure, each part playing a specific role in the crochet process. Here’s a breakdown of the essential parts of a crochet hook:
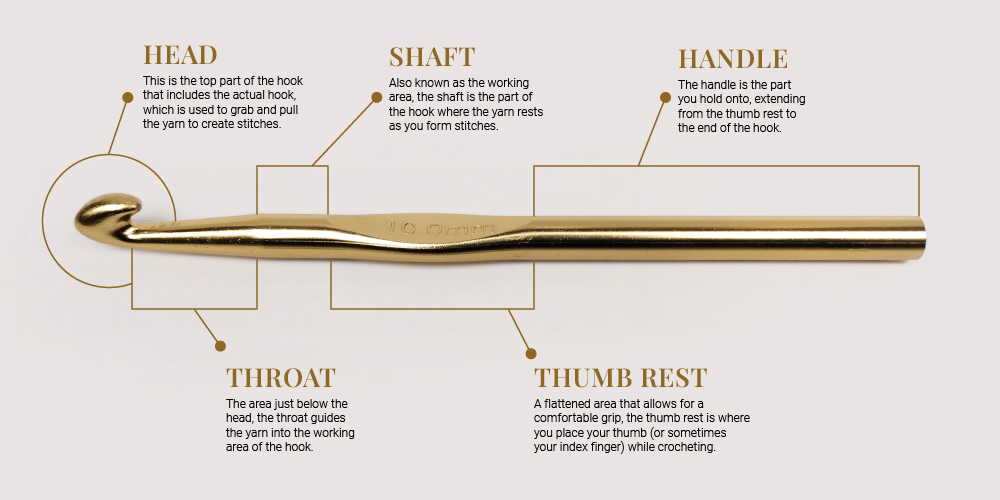
Head: This is the top part of the hook that includes the actual hook. The head is used to grab and pull the yarn through loops to create stitches.
Throat: The area just below the head, the throat guides the yarn into the working area of the hook. It’s usually tapered and helps manage the yarn’s tension as it moves through the hook.
Shaft: Also known as the working area, the shaft is the part of the hook where the yarn rests as you form stitches. The diameter of the shaft determines the size of the stitches and is what the hook size refers to. For example, a 5 mm hook has a shaft diameter of 5 mm.
Thumb Rest: A flattened area that allows for a comfortable grip, the thumb rest is where you place your thumb (or sometimes your index finger) while crocheting. This part provides stability and control, making it easier to handle the hook.
Handle: The handle is the part you hold onto, extending from the thumb rest to the end of the hook. Handles can vary greatly in shape and length, sometimes featuring ergonomic designs to reduce hand strain. The handle should fit comfortably in your hand, allowing you to crochet for extended periods without discomfort.
Regardless of your holding style, your hand should fit comfortably between the handle and the thumb rest. The shaft, neck, and head should remain free, as these parts are used to work the yarn.
And if you’re curious to learn more about the various types of crochet hooks, check out my detailed blog post about crochet hooks.
How to Hold the Crochet Hook
Typically, we hold the hook with our dominant hand, the same one we use for writing. However, there’s no strict rule about which hand to use. Whether you crochet with your right or left hand, the important thing is to hold the hook with the hand that feels most comfortable and natural to you.

Left-Handed Crocheting: Work from left to right.

Right-Handed Crocheting: Work from right to left.
Useful tip! If you crochet with your left hand, keep in mind that most patterns are written for right-handed people. You might need to reverse instructions or graphics in some cases.
The Most Common Ways To Hold a Crochet Hook
Among the styles used to handle the crochet hook, two are particularly common: the pencil grip and the knife grip. If you’re just starting out, I suggest trying both styles to find the one that best suits you.
The Pencil Grip
The pencil grip, also known as the underhand grip, mimics the way we hold a pencil or pen for writing. In this style, the crochet hook rests on the middle finger, with the thumb and index finger guiding the hook from the thumb rest. The handle extends outward from the hand, positioned between the base of the index finger and the thumb.

The Knife Grip
The knife grip, also known as the overhand grip, resembles how we hold a knife to cut food. When using this style, the handle of the crochet hook is held with the tip of the index finger placed on the thumb rest.

The handle of the hook is held within the hand, positioned somewhere between the base of the little finger and the side of the palm.

Exploring Other Styles and Choosing the Right One
There are other less popular ways to hold your crochet hook, and you can even develop a unique style if it works for you. The way we hold the hook is very personal. The right style is the one that allows you to perform your stitches with precision and comfort. Don’t stick to a particular style that doesn’t meet these fundamental requirements.
Notice that if you’re new to crochet, it’s normal to experience some muscle discomfort, similar to starting a new exercise your body isn’t used to. However, this discomfort should be purely muscular and should not persist.
If you experience prolonged discomfort, acute pain, or joint discomfort, it’s advisable to stop crocheting and consult a doctor or physiotherapist.
Combining Styles and Finding Balance

Feel free to switch between styles to prevent muscle strain and repetitive stress injuries. Each style engages different muscles, so alternating can provide some muscles with a break. However, maintaining consistency in stitches is essential for achieving a flawless result. Be cautious when switching styles within the same project, as it may impact stitch uniformity.
Holding the Yarn Properly for Perfect Crochet
Just like with hooks, there are various ways to hold the yarn, but the main goal is to achieve balanced tension for precise stitches. Finding the yarn-holding technique that works best for you can greatly enhance your crocheting experience. Here are a few possible ways to give it a try:
Passing the Yarn Through Your Fingers
A common technique involves passing the yarn under the little finger, over the ring finger, under the middle finger, and over the index finger. Hold your work between your middle finger and thumb for stability.


Wrapping the Yarn Around the Little Finger
Pass the yarn under and wrap it around your little finger. Continue with the yarn under the ring and middle fingers and then over the index finger. Again, hold your work between your middle finger and thumb.


Wrapping the Yarn Around the Index Finger
Alternatively, some find it more comfortable to wrap the yarn around the index finger. Maintain stability by holding your work between your middle finger and thumb.


Tips for Regulating Yarn Tension
Once you’ve chosen your method for holding the yarn, the next step is to regulate its tension. Tension is crucial in crochet because it affects the firmness of your stitches and, consequently, the appearance of your finished projects. Tight stitches are ideal for projects needing structure, like bags, baskets, or amigurumi, ensuring the piece retains its shape and firmness. On the other hand, loose stitches are better for garments and accessories, providing flexibility and comfort.
Adjusting tension is about controlling the yarn flow between your fingers. Spread your fingers for looser stitches and bring them together for tighter stitches.

Separate your fingers to allow the thread to move more freely, resulting in less tension on the yarn. This will produce looser stitches.

Bring your fingers together to create more resistance for the thread, increasing tension. This will result in tighter stitches.
Useful tip! Don't pull the yarn too tightly, as this can cause it to deform. Remember that some types of yarn are more durable, but others can easily lose their shape.
Experimenting and Learning
There’s no one-size-fits-all approach to holding the hook and yarn. Try different styles to see which one suits you best. It may take some time but don’t get discouraged. Every experienced crocheter started as a beginner.
Be patient with yourself. Relax, have fun, and practice, practice, practice!
Common Questions About Holding the Crochet Hook and Yarn (FAQ)
The best way to hold a crochet hook is the one that feels most comfortable and natural to you. The two most common grips are the pencil grip and the knife grip.
Experiment with both the pencil grip and the knife grip to see which one suits you best. Comfort and ease of control are key factors.
Yarn tension is crucial because it affects the firmness and appearance of your stitches. Proper tension ensures consistent and neat stitches.
Yes, you can switch between different grips, but be mindful that it might affect the uniformity of your stitches. Practice switching grips to maintain consistency.
If you experience prolonged discomfort, acute pain, or joint discomfort, it’s advisable to stop crocheting and consult a doctor or physiotherapist.